Coursera
#@title Licensed under the Apache License, Version 2.0 (the "License");
# you may not use this file except in compliance with the License.
# You may obtain a copy of the License at
#
# https://www.apache.org/licenses/LICENSE-2.0
#
# Unless required by applicable law or agreed to in writing, software
# distributed under the License is distributed on an "AS IS" BASIS,
# WITHOUT WARRANTIES OR CONDITIONS OF ANY KIND, either express or implied.
# See the License for the specific language governing permissions and
# limitations under the License.
Copyright 2019 The TensorFlow Authors.
#@title Licensed under the Apache License, Version 2.0 (the "License");
# you may not use this file except in compliance with the License.
# You may obtain a copy of the License at
#
# https://www.apache.org/licenses/LICENSE-2.0
#
# Unless required by applicable law or agreed to in writing, software
# distributed under the License is distributed on an "AS IS" BASIS,
# WITHOUT WARRANTIES OR CONDITIONS OF ANY KIND, either express or implied.
# See the License for the specific language governing permissions and
# limitations under the License.
Getting Started with TensorFlow Hub
TensorFlow Hub is a repository of reusable TensorFlow machine learning modules. A module is a self-contained piece of a TensorFlow graph, along with its weights and assets, that can be reused across different tasks. These modules can be reused to solve new tasks with less training data, diminishing training time.
In this notebook we will go over some basic examples to help you get started with TensorFlow Hub. In particular, we will cover the following topics:
-
Loading TensorFlow Hub Modules and Performing Inference.
-
Using TensorFlow Hub Modules with Keras.
-
Using Feature Vectors with Keras for Transfer Learning.
-
Saving and Running a TensorFlow Hub Module Locally.
-
Changing the Download Location of TensorFlow Hub Modules.
Setup
try:
    %tensorflow_version 2.x
except:
    pass
Colab only includes TensorFlow 2.x; %tensorflow_version has no effect.
import os
import numpy as np
import matplotlib.pyplot as plt

import tensorflow as tf
import tensorflow_hub as hub

from PIL import Image


print("\u2022 Using TensorFlow Version:", tf.__version__)
• Using TensorFlow Version: 2.14.0
Download Test Image
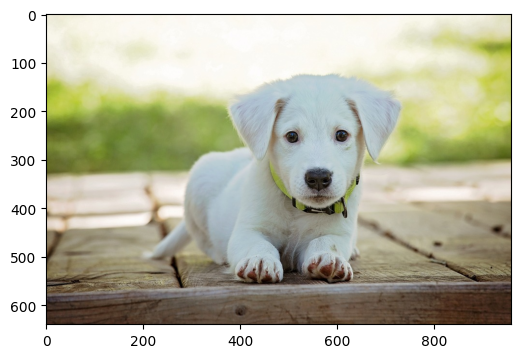
We will download the image of a puppy to test our TensorFlow Hub modules.
!wget -O dog.jpeg https://cdn.pixabay.com/photo/2016/12/13/05/15/puppy-1903313_960_720.jpg

original_image = Image.open('./dog.jpeg')
--2023-10-29 14:31:05--  https://cdn.pixabay.com/photo/2016/12/13/05/15/puppy-1903313_960_720.jpg
Resolving cdn.pixabay.com (cdn.pixabay.com)... 104.18.40.96, 172.64.147.160, 2606:4700:4400::ac40:93a0, ...
Connecting to cdn.pixabay.com (cdn.pixabay.com)|104.18.40.96|:443... connected.
HTTP request sent, awaiting response... 200 OK
Length: 109120 (107K) [binary/octet-stream]
Saving to: ‘dog.jpeg’

dog.jpeg            100%[===================>] 106.56K  --.-KB/s    in 0.02s

2023-10-29 14:31:06 (4.27 MB/s) - ‘dog.jpeg’ saved [109120/109120]
Let’s take a look at the image we just downloaded.
plt.figure(figsize=(6,6))
plt.imshow(original_image)
plt.show()
Format Image
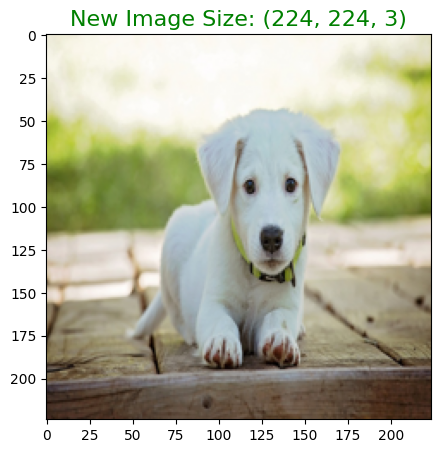
We will now resize and normalize our image so that is compatible with the module we are going to use. In this notebook we will use the MobileNet model which was trained in ImageNet. For this module, the input images are expected to have color values in the range [0,1] and to have an input size of (224,224).
IMAGE_SIZE = (224, 224)

img = original_image.resize(IMAGE_SIZE)
img = np.array(img) / 255.0
Let’s now plot the reformatted image, to see what it looks like.
plt.figure(figsize=(5,5))
plt.imshow(img)
plt.title('New Image Size: {}'.format(img.shape), fontdict={'size': 16}, color='green')
plt.show()
Get ImageNet Labels
We will now get the labels for all the 1001 classes in the ImageNet dataset.
!wget -O labels.txt --quiet https://storage.googleapis.com/download.tensorflow.org/data/ImageNetLabels.txt

with open('labels.txt', 'r') as f:
    labels = [l.strip() for l in f.readlines()]

# get number of labels
num_classes = len(labels)

print('There are a total of {0} labels representing {0} classes.\n'.format(num_classes))
There are a total of 1001 labels representing 1001 classes.
Let’s take a look at the first 5 labels.
for label in labels[0:5]:
    print(label)
background
tench
goldfish
great white shark
tiger shark
Loading a TensorFlow Hub Module
To load a module, we use its unique module handle, which is just a URL string. To obtain the module handle, we have to browse through the catalog of modules in the TensorFlow Hub website.
For example, in this case, we will be using the complete MobileNet model. If we go to MobileNet’s webpage in the TensorFlow Hub website, we will see that the module handle for this module is:
'https://tfhub.dev/google/tf2-preview/mobilenet_v2/classification/4'
Finally, we’ll make use of TensorFlow Hub’s, load API to load the module into memory.
# if you are running the notebook on Colab
MODULE_HANDLE = 'https://tfhub.dev/google/tf2-preview/mobilenet_v2/classification/4'

# if you are running the notebook on your local machine
# MODULE_HANDLE = './models/tf2-preview_mobilenet_v2_classification_4'

module = hub.load(MODULE_HANDLE)
Performing Inference
Once we have loaded the module, we can then start running inference on it. Note however, that the module generates the final layer’s logits without any activations. Therefore, we have to apply the softmax activation to the module’s output. The result will be a Tensor of shape (1, 1001), where the first dimension refers to the batch size. In this case it is just 1 because we only passed 1 image.
In the cell below, we will pass the image of the puppy and get the top 5 predictions from our model along with their probability scores.
predictions = tf.nn.softmax(module([img]))[0]

top_k_pred_values, top_k_indices = tf.math.top_k(predictions, k=5)

top_k_pred_values = top_k_pred_values.numpy()
top_k_indices = top_k_indices.numpy()

for value, i in zip(top_k_pred_values, top_k_indices):
    print('{}: {:.3}'.format(labels[i], value))
Labrador retriever: 0.389
Great Pyrenees: 0.0767
kuvasz: 0.0697
tennis ball: 0.0481
Old English sheepdog: 0.0283
Using a TensorFlow Hub Module with Keras
We can also integrate TensorFlow Hub modules into the high level Keras API. In this case, we make use of the hub.KerasLayer API to load it. We can add the hub.KerasLayer to a Keras sequential model along with an activation layer. Once the model is built, all the Keras model methods can be accessed like you would normally do in Keras.
model = tf.keras.Sequential([
        hub.KerasLayer(MODULE_HANDLE,
                       input_shape=IMAGE_SIZE + (3,)),
        tf.keras.layers.Activation('softmax')
])
Performing Inference
To perform inference with the Keras model, we have to add a dimension to our image to account for the batch size. Remember that our Keras model expects the input to have shape (batch_size, image_size), where the image_size includes the number of color channels.
# Add batch dimension
img_arr = np.expand_dims(img, axis=0)
As we did previously, in the cell below we will pass the image of the puppy and get the top 5 predictions from our Keras model along with their probability scores.
predictions = model.predict(img_arr)[0]

top_k_pred_values, top_k_indices = tf.math.top_k(predictions, k=5)

top_k_pred_values = top_k_pred_values.numpy()
top_k_indices = top_k_indices.numpy()

for value, i in zip(top_k_pred_values, top_k_indices):
    print('{}: {:.3}'.format(labels[i], value))
1/1 [==============================] - 0s 499ms/step
Labrador retriever: 0.389
Great Pyrenees: 0.0767
kuvasz: 0.0697
tennis ball: 0.0481
Old English sheepdog: 0.0283
Using Feature Vectors with Keras
While we can use complete models as we did in the previous section, perhaps, the most important part of TensorFlow Hub is in how it provides Feature Vectors that allows us to take advantage of transfer learning. Feature vectors are just complete modules that had their final classification head removed.
In the cell below we show an example of how a feature vector can be added to a Keras sequential model.
# if you are running the notebook on Colab
MODULE_HANDLE = "https://tfhub.dev/google/tf2-preview/mobilenet_v2/feature_vector/4"

# if you are running the notebook on your local machine
# MODULE_HANDLE = "./models/tf2-preview_mobilenet_v2_feature_vector_4"
# Number of classes in the new dataset
NUM_CLASSES = 20

model = tf.keras.Sequential([
        hub.KerasLayer(MODULE_HANDLE,
                       input_shape=IMAGE_SIZE + (3,)),
        tf.keras.layers.Dense(NUM_CLASSES, activation='softmax')
])
Now that the model is built, the next step in transfer learning will be to train the model on a new dataset with the new classifier (i.e. the last layer of the model). Remember that the number of output units in the last layer will correspond to the number of classes in your new dataset. After the model has been trained, we can perform inference in the same way as with any Keras model (see previous section).
Saving a TensorFlow Hub Module for Local Use
We can download TensorFlow Hub modules, by explicitly downloading the module as a SavedModel archived as a tarball. This is useful if we want to work with the module offline.
To do this, we first have to download the Hub module by appending a query parameter to the module handled URL string. This is done by setting the TF Hub format query parameter as shown below. For now, only the compressed option is defined.
# # skip running this code block if you are running the notebook on your local machine
# # run it if you are running the notebook on Colab

# MODULE_HANDLE = 'https://tfhub.dev/google/tf2-preview/mobilenet_v2/classification/4?tf-hub-format=compressed'
# !wget -O ./saved_model.tar.gz $MODULE_HANDLE

# # Untar the tarball
# !mkdir -p ./saved_model
# !tar xvzf ./saved_model.tar.gz -C ./saved_model
Running a TensorFlow Hub Module Locally
We can load the SavedModel containing the saved TensorFlow Hub module by using hub.load.
module = hub.load('./saved_model')
---------------------------------------------------------------------------

OSError                                   Traceback (most recent call last)

<ipython-input-19-c07798e88ad1> in <cell line: 1>()
----> 1 module = hub.load('./saved_model')


/usr/local/lib/python3.10/dist-packages/tensorflow_hub/module_v2.py in load(handle, tags, options)
     91   if not isinstance(handle, str):
     92     raise ValueError("Expected a string, got %s" % handle)
---> 93   module_path = resolve(handle)
     94   is_hub_module_v1 = tf.io.gfile.exists(
     95       native_module.get_module_proto_path(module_path))


/usr/local/lib/python3.10/dist-packages/tensorflow_hub/module_v2.py in resolve(handle)
     46     A string representing the Module path.
     47   """
---> 48   return registry.resolver(handle)
     49
     50


/usr/local/lib/python3.10/dist-packages/tensorflow_hub/registry.py in __call__(self, *args, **kwargs)
     47     for impl in reversed(self._impls):
     48       if impl.is_supported(*args, **kwargs):
---> 49         return impl(*args, **kwargs)
     50       else:
     51         fails.append(type(impl).__name__)


/usr/local/lib/python3.10/dist-packages/tensorflow_hub/resolver.py in __call__(self, handle)
    497   def __call__(self, handle):
    498     if not tf.compat.v1.gfile.Exists(handle):
--> 499       raise IOError("%s does not exist." % handle)
    500     return handle
    501


OSError: ./saved_model does not exist.
After the TensorFlow Hub module is loaded, we can start making inferences as shown below. As before, we will pass the image of the puppy and get the top 5 predictions from our model along with their probability scores.
predictions = tf.nn.softmax(module([img]))[0]

top_k_pred_values, top_k_indices = tf.math.top_k(predictions, k=5)

top_k_pred_values = top_k_pred_values.numpy()
top_k_indices = top_k_indices.numpy()

for value, i in zip(top_k_pred_values, top_k_indices):
    print('{}: {:.3}'.format(labels[i], value))
Changing the Download Location of TensorFlow Hub Modules.
Finally, we can change the download location of TensorFlow Hub modules to a more permanent location. We can do this by setting the environment variable 'TFHUB_CACHE_DIR' to the directory we want our modules to be saved in.
In Python, we can set this environment variable in the environment dictionary that’s present in the Pythons os module as you can see below.
new_dir = './hub_cache_dir'

os.environ['TFHUB_CACHE_DIR'] = new_dir
Once we set the new location of the TF Hub cache directory environment variable, all the subsequent modules that we request will get downloaded to that location.
MODULE_HANDLE = 'https://tfhub.dev/google/tf2-preview/mobilenet_v2/classification/4'
module = hub.load(MODULE_HANDLE)
We can take a look the contents of the new directory and all its subdirectories by using the -R option.
!ls -R {new_dir}